Installing new floors is one of the best ways to update your home. It can completely change the look and feel of a room. Whether you’re renovating your living room, bedroom, or kitchen, new floors add style and value to your space.
This guide will walk you through every step of installing new floors. From choosing the right materials to finishing the last touches, we’ve got you covered. Plus, we’ll recommend products to help make your job easier and more efficient.
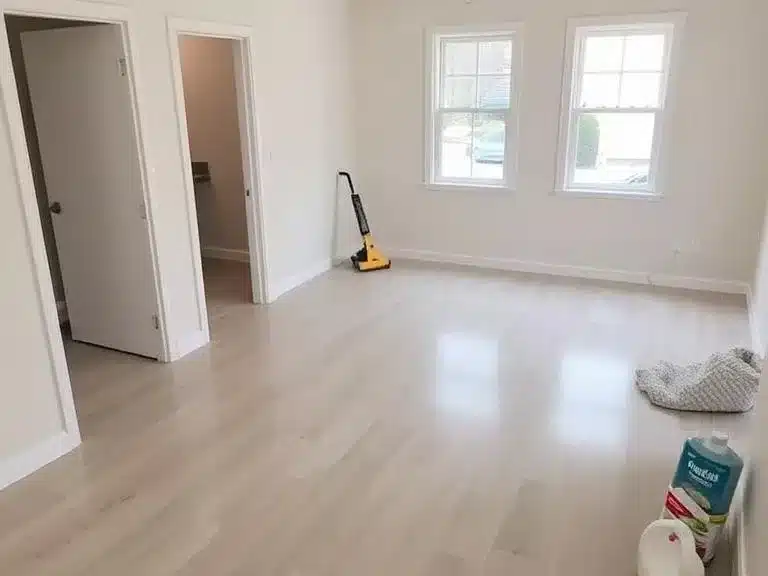
Ready to get started? Let’s dive in!
1. Determine the Type of Flooring
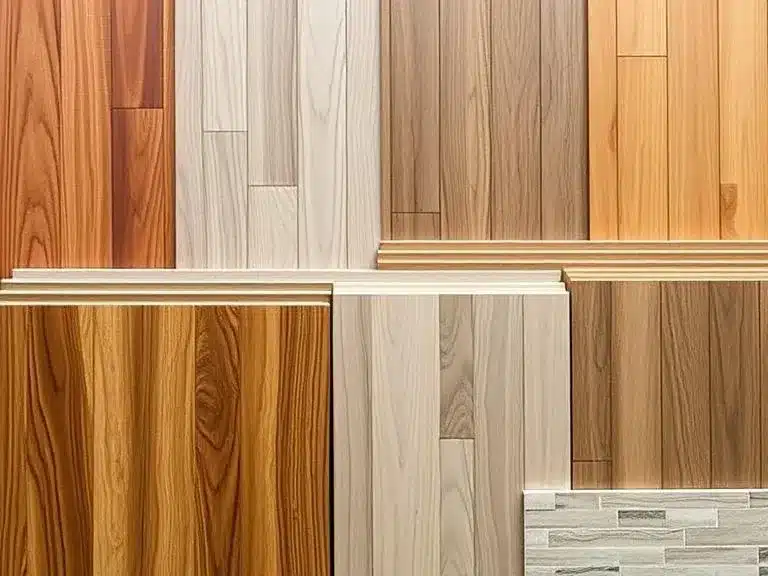
The first step is deciding what type of flooring you want. There are several options, and each has its benefits. The key is choosing the one that fits your needs, style, and budget.
Hardwood Flooring
This classic choice adds warmth and beauty to any room. It’s durable and can last for many years with proper care. There are two main types: solid wood and engineered wood. Solid wood is traditional, while engineered wood is more affordable and resistant to moisture.
Buy on Amazon: Art3d Peel and Stick Floor Wood Plank 36-Pack
Laminate Flooring
Laminate is a great budget-friendly option. It looks like wood or stone but is made from composite materials. It’s easy to install, scratch-resistant, and low-maintenance.
Buy on Amazon: Laminate Flooring with Wooden Grain Effect
Vinyl Flooring
Vinyl is versatile and comes in different forms, like planks or sheets. Luxury vinyl planks (LVP) are a popular choice as they mimic wood or tile beautifully. It’s water-resistant, making it perfect for kitchens and bathrooms.
Buy on Amazon: Nexus 12-Inch Vinyl Floor Tiles, 20 Tiles
Tile Flooring
Tile offers durability and is ideal for wet areas like bathrooms and kitchens. Ceramic and porcelain tiles come in various sizes and designs. They’re easy to clean and can last a long time.
Buy on Amazon: Calacatta Empire Ceramic Tile for Walls Floors
Cork and Bamboo Flooring
Cork is eco-friendly and provides a cushioned feel underfoot. Bamboo is a sustainable option that mimics the look of hardwood. Both options are durable and give a unique, natural look
Choose the flooring that best fits your space and lifestyle.
Buy on Amazon: Solid Bamboo Flooring Planks – 37.8 Inch
2. Gather Necessary Tools and Materials
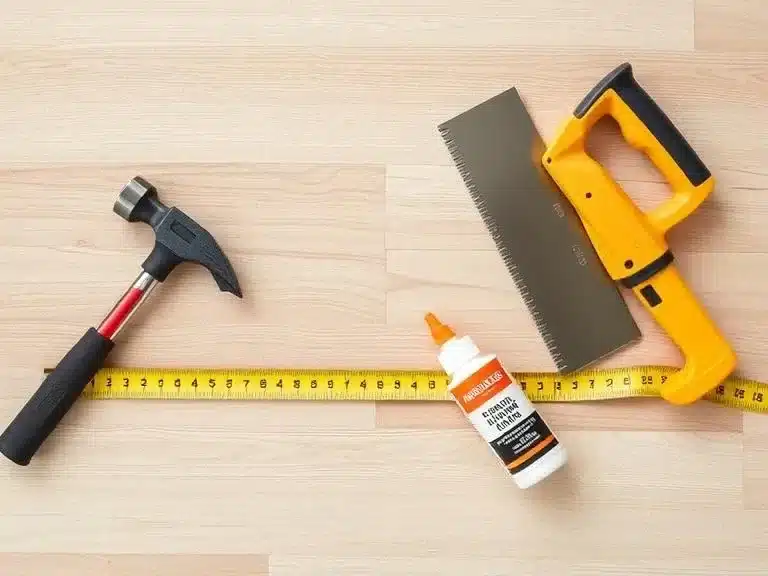
Before you start, make sure you have all the tools and materials ready. This will help the installation process go smoothly. You may buy these necessary tools and materials from Amazon, which we recommended below.
Essential Tools
You’ll need a few basic tools:
- Measuring Tape: To measure your room and cut the flooring to size.
- Level: Ensure the floor is even during installation.
- Utility Knife: For cutting vinyl or laminate.
- Hammer and Tapping Block: To fit the flooring together securely.
- Saws: If you’re working with wood or tile, you’ll need a saw to cut pieces to fit.
- Pry Bar: To remove old flooring, if necessary.
- Drill: For any screws, especially with tile or hardwood.
Materials
Make sure you have the flooring materials you chose earlier. This includes:
- Underlayment: Used under hardwood or laminate for added comfort and soundproofing.
- Adhesive: For vinyl and tile flooring.
- Transition Strips: These are used to cover gaps between rooms or flooring types.
- Molding or Baseboards: To finish off the edges for a neat look.
Having all the right tools and materials will save you time and make the installation process much easier.
3. Prepare the Room for Installation
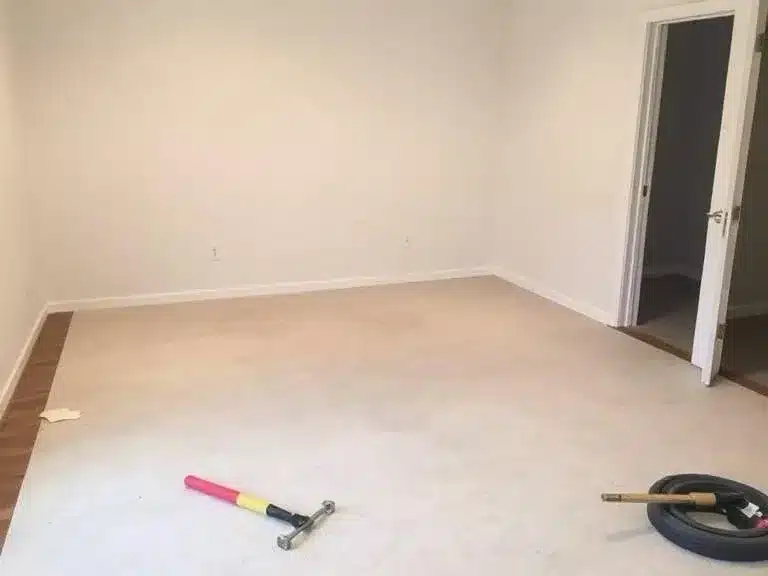
Now that you have everything you need, it’s time to prepare the room. A clean and level surface is essential for a smooth installation.
Clear the Space
Start by removing all furniture, rugs, and any other items from the room. This will give you plenty of room to work and help prevent damage to your belongings.
Remove Old Flooring
If you’re replacing existing floors, you’ll need to take out the old flooring first. Use a pry bar to lift up any old materials like carpet, tile, or laminate. Be careful not to damage the subfloor beneath.
Clean the Subfloor
Once the old floor is gone, clean the subfloor. Sweep away any dust or debris and check for any uneven areas. The subfloor should be smooth and level to ensure your new floor lays flat.
Check for Moisture
If you’re installing wood or laminate floors, it’s important to make sure the subfloor is dry. Moisture can cause warping and damage to your new floors. You can use a moisture meter to check the levels.
With a clean, level surface, you’re ready to start installing your new flooring.
4. Measure and Plan the Floor Layout
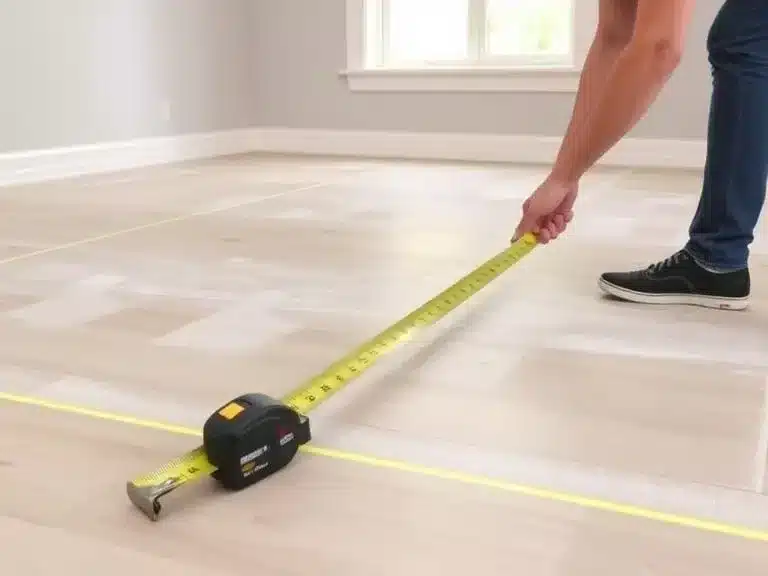
Before you start laying down your new floors, it’s important to measure and plan the layout. This ensures that everything fits properly and looks good.
Measure the Room
First, measure the length and width of the room. Multiply these numbers to find the total square footage. This will help you determine how much flooring you need.
Account for Irregularities
If the room isn’t a perfect square or rectangle, measure any angles or curves carefully. Take note of doorways and any other features that might affect the layout.
Plan the Layout
Think about how you want the floor to look. If you’re using planks, arrange them in a direction that flows with the room’s shape. For tiles, consider a pattern or grid layout. Use a chalk line to mark straight lines and ensure everything lines up.
A well-planned layout will make the installation process smoother.
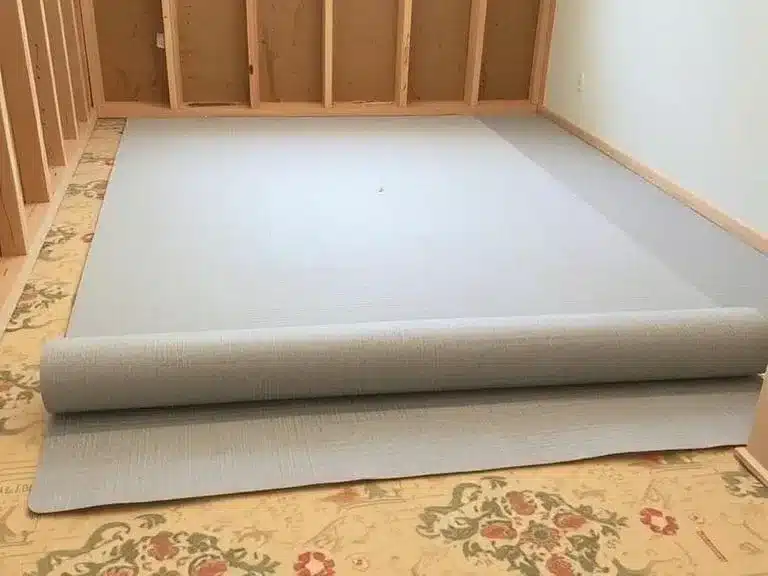
5. Install the Underlayment (if needed)
Some types of flooring, like hardwood or laminate, require an underlayment. This helps with soundproofing, comfort, and even floor performance.
Why Underlayment Is Important
Underlayment creates a smooth surface and helps protect your new floor. It can also improve insulation and prevent moisture buildup.
How to Install Underlayment
Roll out the underlayment across the subfloor. Make sure the edges butt up against the walls. If you need to use more than one roll, tape the seams together to avoid any gaps. For extra protection, consider a vapor barrier underlayment in areas with high moisture levels.
6. Begin Installing the Flooring
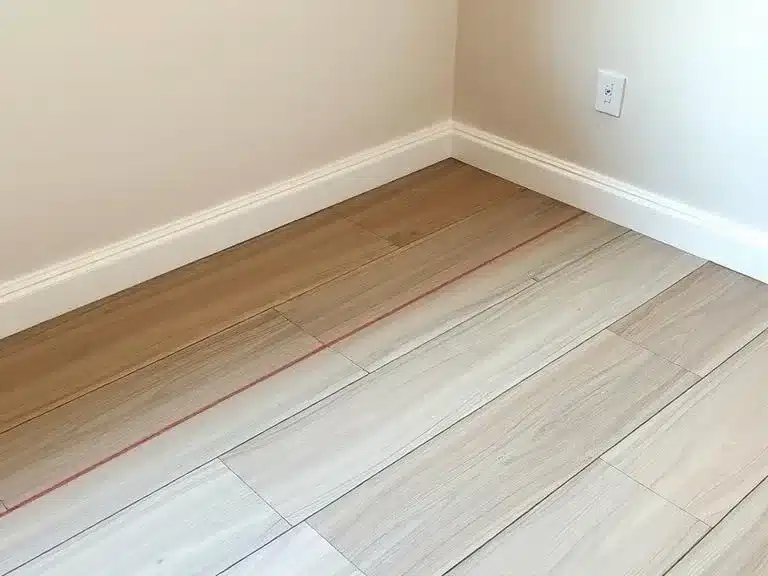
Now comes the fun part—installing the flooring. Follow the manufacturer’s instructions for the specific type of flooring you’ve chosen.
For Hardwood or Laminate
Start in one corner of the room. Place the first plank or board and use spacers along the wall to leave a small gap for expansion. Continue laying down the planks, locking them together as you go. Use a tapping block to gently tap the planks into place. Make sure the edges align neatly.
For Vinyl Flooring
If you’re using vinyl planks, start by laying them in the same direction as the room’s longest wall. If it’s a glue-down type, apply adhesive in sections and press the vinyl into place. For floating vinyl planks, simply snap them together and let them float.
For Tile Flooring
For tiles, begin at the center of the room. Spread thin-set adhesive using a notched trowel, then lay each tile carefully, pressing down to ensure a secure fit. Make sure tiles are straight by using spacers and adjusting as needed.
7. Cut Flooring to Fit Around Obstacles
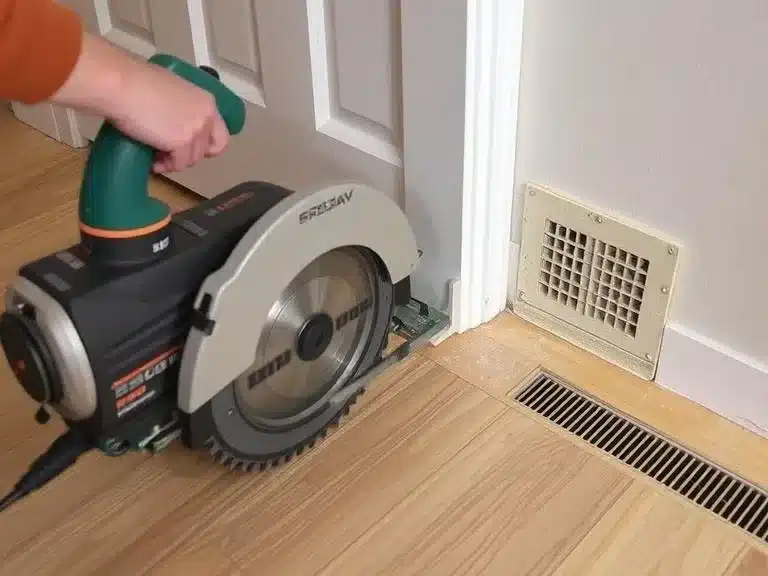
Most rooms have obstacles like doors, vents, or corners that need to be cut to fit the flooring perfectly.
Cutting the Flooring
Use a saw to trim planks or tiles to fit around these obstacles. For wood or laminate, a jigsaw or miter saw works best. For tile, use a tile cutter or wet saw to get precise cuts.
Trim Around Edges
When cutting near walls or doorways, leave a small gap for expansion. This is especially important for hardwood and laminate flooring. For tiles, measure carefully and cut around corners or fixtures.
With precise cuts, your floor will look seamless and professional.
8. Install Transition Strips and Moldings
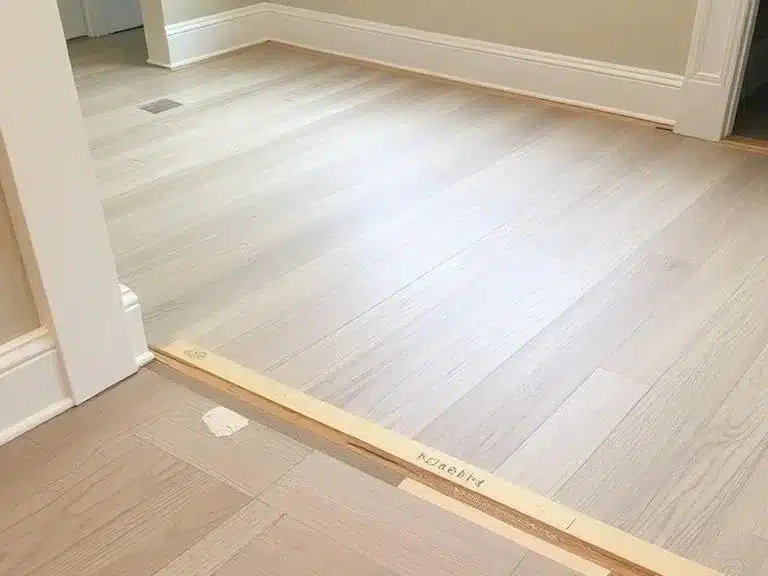
Transition strips and moldings are the finishing touches that complete your floor installation.
Why Transition Strips Are Important
Transition strips are used between rooms or where two different types of flooring meet. They cover any gaps and create a smooth transition from one floor to another.
How to Install Transition Strips
Place the transition strips at doorways and along the edges where the flooring changes. You can use glue or nails to secure them in place. Make sure they align evenly with the floor.
Molding or Baseboards
Install molding around the edges of the room to cover the expansion gaps. This gives your floor a clean, finished look. Nail the molding in place or use adhesive for a no-hassle option.
9. Final Touches and Clean-Up
The final step is to clean up and enjoy your new floor.
Clean the Floor
Sweep or vacuum up any dust and debris from the installation. For vinyl or laminate floors, use a damp mop to remove any leftover dirt. For tile, wipe down the grout lines and clean off any adhesive residue.
Inspect the Floor
Look over the floor carefully for any gaps or imperfections. If you find any issues, fix them before putting furniture back in the room.
Enjoy Your New Floor!
Once everything is clean and set, you’re ready to admire your work. Enjoy your beautiful new floor, and take pride in your DIY skills!
Conclusion
Installing new floors can transform your home and give it a fresh, updated look. By following these simple steps, you can tackle the project with confidence and enjoy beautiful results. Whether you choose hardwood, tile, or vinyl, the right preparation and careful installation will make a huge difference.
Thank you for reading! We hope this guide helps you achieve the perfect floor for your home. Happy renovating!
FAQs
How long does it take to install new floors?
The time it takes to install new floors depends on the size of the room and the type of flooring you’re using. On average, it can take anywhere from a few hours to a couple of days. Hardwood and tile installations may take longer due to the need for precise cuts and longer drying times.
Can I install new flooring on my own, or do I need a professional?
Many homeowners can install flooring on their own, especially with materials like laminate, vinyl, or floating floors. However, if you’re working with hardwood or tile, it may require more advanced skills. Consider your experience level and the tools required before deciding.
What should I do if my new floor has gaps or uneven spots?
If you notice gaps or uneven spots, you should address them before finishing the installation. For laminate or hardwood, check that the planks are properly locked in place. For tile, you may need to adjust grout lines or reapply adhesive. Using spacers during installation helps avoid gaps.
Can I install new flooring over old flooring?
In most cases, it’s best to remove old flooring before installing new floors, especially if the subfloor is damaged or uneven. However, some types of flooring, like vinyl or laminate, can be installed over existing floors as long as the surface is clean, smooth, and level. Always check the manufacturer’s recommendations.
Recent Posts
- 10 Best Nesting Tables for Small Spaces and Apartments

- 10 Best Ladder Bookshelves for Stylish Home Organization

- 9 Best Storage Trunks for Home Organization and Style

- 10 Best Room Dividers for Privacy and Stylish Spaces

- 11 Best Bar Carts for Entertaining Guests in Style

- 10 Best Decorative Accent Cabinets for Stylish Home Storage

- 9 Best Convertible Futons and Sofa Beds for Small Apartments

- 10 Best Modular Furniture Sets for Flexible and Functional Living

- 10 Best Cube Storage Units for Organized and Stylish Homes

- 9 Best Closet Organizer Systems for Maximizing Your Space

- 10 Best Murphy Beds and Wall Beds for Small Guest Rooms

- 15 Best Folding Furniture Pieces for Small Apartments and Studios

- 12 Best Storage Ottomans for Small Spaces and Apartment Living

- 9 Best Activity Tables for Kids for Fun and Learning

- 9 Best Kids’ Dressers for Organized Bedrooms